
Configure AEM Plugin for Eclipse
The aim of this tutorials is to learn, How to configure AEM Plugin in Eclipse and use aem server to sync code between aem instance and eclipse.
The main advantage of using this plugin over traditional Maven arch type project is:-
- Its easy integration with eclipse.
- Synchronization of both content and OSGI bundles.
- Debugging support
- Hot swapping of code means no need to re build every time.
- Easy access to JCR properties.
Currently AEM Developer Tool support is available for 5.6,6.0,6.1 and can be used with Eclipse Kepler and above.
Pre-requisite
- Install Eclipse
- Start AEM instance in debug mode
You can use below command to start server in debug mode
java -Xmx2048M -XX:MaxPermSize=256M -agentlib:jdwp=transport=dt_socket,server=y,suspend=n,address=10123 -jar AEM_6.1_Quickstart-author-4502.jar -nofork
Install AEM Plugin for Eclipse
- Open eclipse –> Go to help –> install new software

- Click Add and Enter AEM developer tools plugin url http://eclipse.adobe.com/aem/dev-tools/ in Location Field and Click OK.

- Select both AEM and Sling Plugin and Click Next.
- Click Next Accept the license agreement
- Click Finish.
- Once installation completes it will prompt for restarting eclipse. Restart Eclipse.


Note:- Warning pop up may occur as it is an unsigned software click OK on it.
Now lets change the current Perspective to AEM Perspective :
- Go to Windows–> Perspective –> Open Perspective –> Other –> Select AEM.


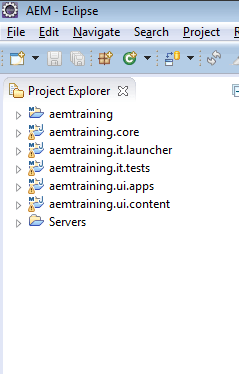
Create AEM Multi Module Project
Follow below steps to create an AEM Multi Module Project :
- Go to File–> New –> Other –> Search for AEM and Select AEM Sample Multi-Module Project –> Click Next.

- Choose project location and archetype. Select archetype 10 from drop down and click Next.

- Configure Arch Type Properties (Project related details) and Click Next.
- Name: Training [Enter Project Name]
- Group Id: com.aemtraining [Enter Package hierarchy]
- Artifact Id: aemtraining [Enter Artifact Id ]

- Create New server and Enter below details.

Note:- Port number an debug port number should be same as there in debug script. click Finish - Your Project structure should look like below:-

- Project should have above 5 modules. core, apps, content, tests and launcher.
- core: Java bundle containing all core functionality like OSGi services, listeners or schedulers, as well as component-related Java code such as servlets.
- ui.apps: contains the /apps (and /etc) parts of the project, i.e js & css clientlibs, components, templates, runmode specific configs as well as Hobbes-tests.
- ui.content: contains sample content using the components from the ui.apps.
- it.tests: Java bundle containing JUnit tests that are executed server-side. This bundle should not be deployed onto production.
- it.launcher: contains code that deploys the ui.tests bundle (and dependent bundles) to the server and triggers the remote JUnit execution.
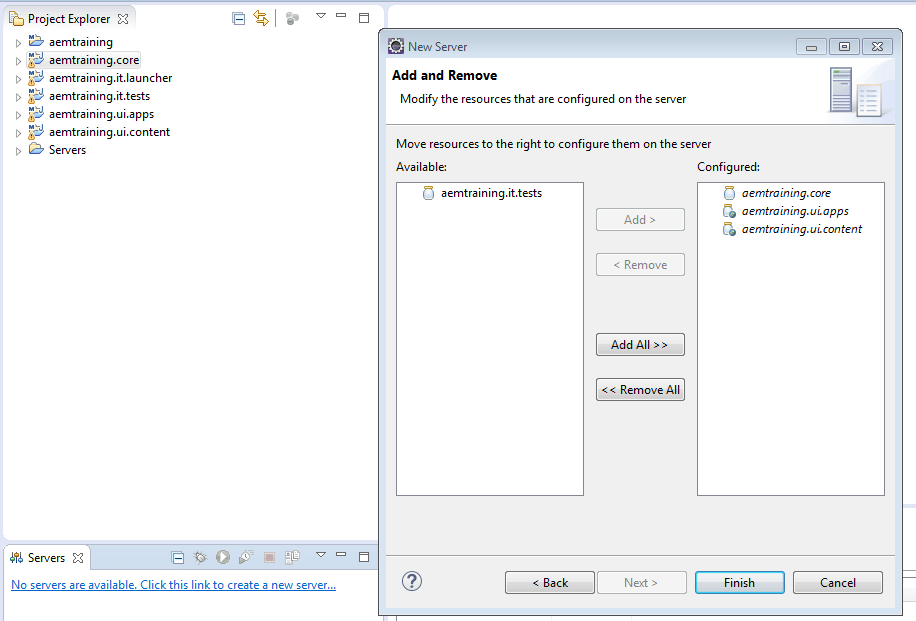
- Right click on the Servers and Click on ‘Add and Remove‘. Add required modules on the server and Click ‘Finish’.

Note:- Remember to exclude Test Module.


Trouble Shooting AEM developer Tools Plugin for Eclipse:
- If your project contains pom.xml errors. Might be maven source doesot downloaded properly.
- Right Click on Core –> Run as –> Maven generate sources.

- Right Click on Core –> Run as –> Maven generate sources.
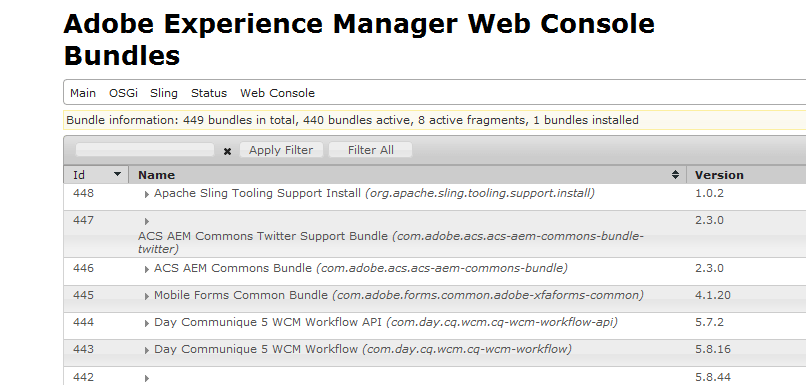
- Go to localhost:4502/system/console.
- Sort bundles based on id , Apache Sling Tooling Support Install and Training-Core should come up.

- If aemtraining project is not comming up or code changes are not getting reflected then:
- Double click on server –> From Add or remove server remove all modules and click Finish.
- Add all modules except test and Click Finish.

Leave a Reply to Hemant Cancel reply